Create Client Credentials for GitHub Actions
By the end of this tutorial, you will have:
- Created secure client credentials for the Webshot Archive API
- Set up authentication for GitHub Actions to upload screenshots
- Enabled automated screenshot comparison in pull requests
Prerequisites
Before starting this tutorial, ensure you have:
- A Webshot Archive account
- Access to your GitHub repository settings
- Admin permissions for the repository (to add secrets and the Webshot Archive Github App)
Overview
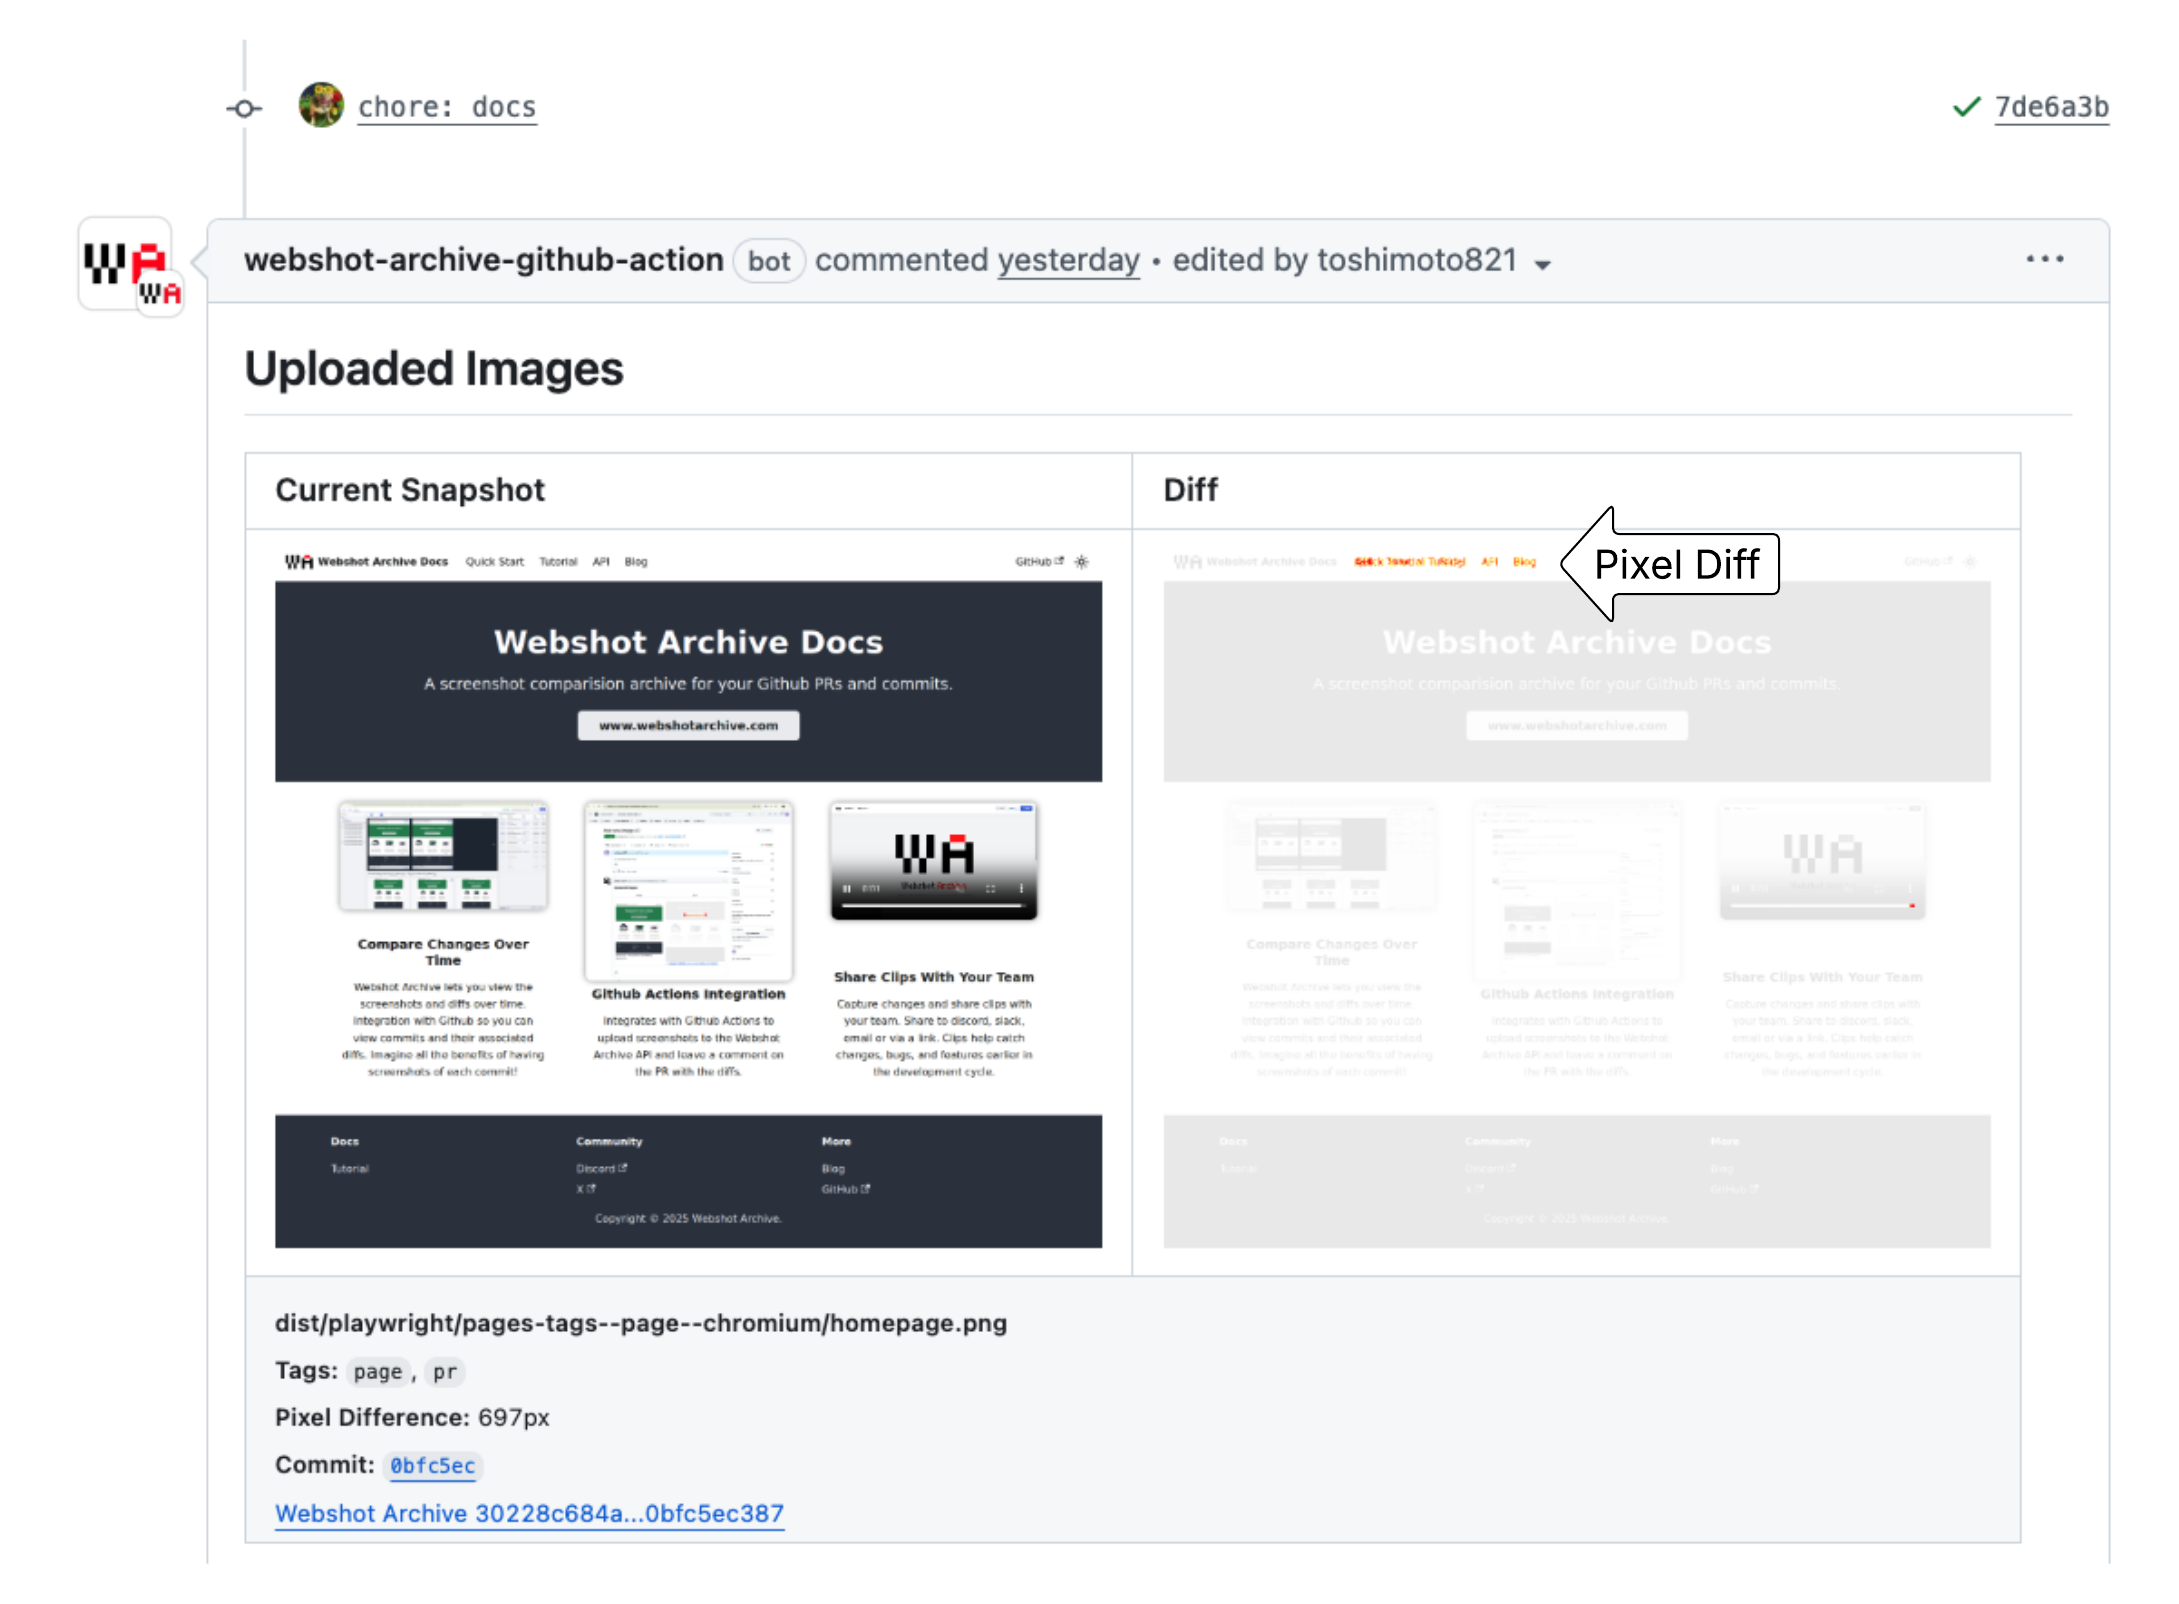
This guide walks you through creating Webshot Archive client credentials that allow your GitHub Actions to securely authenticate with the Webshot Archive API. These credentials will be used to upload screenshots and retrieve comparison results.
Step-by-Step Instructions
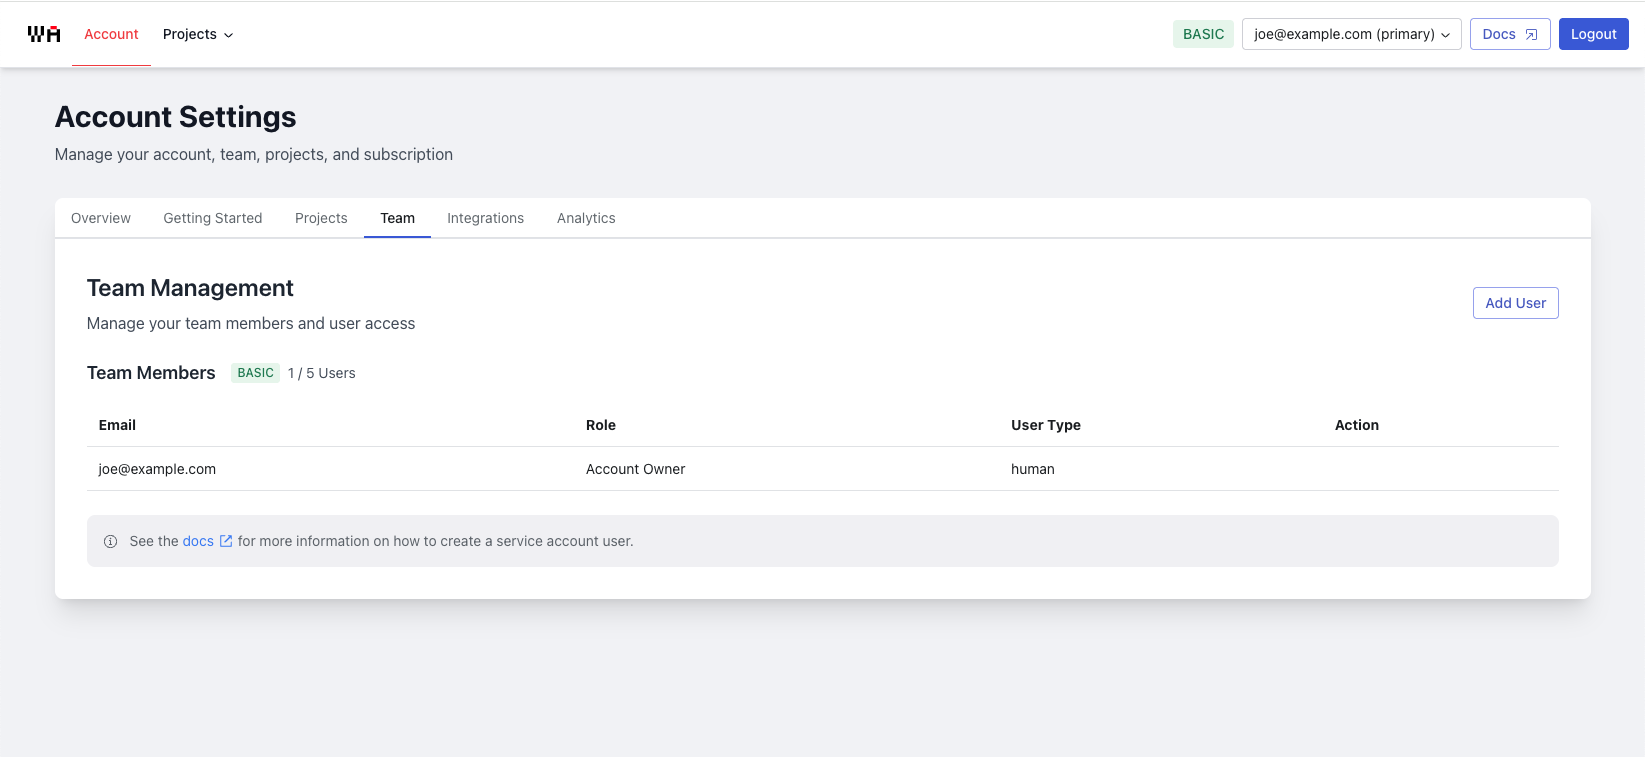
Step 1: Access the Account Management Page
- Navigate to the Webshot Archive account page
- Look for the Team Members section in the Team tab
- You should see your primary user
If you just created your Webshot Archive account, a default service account may already exist. Check the users list before proceeding to Step 2.
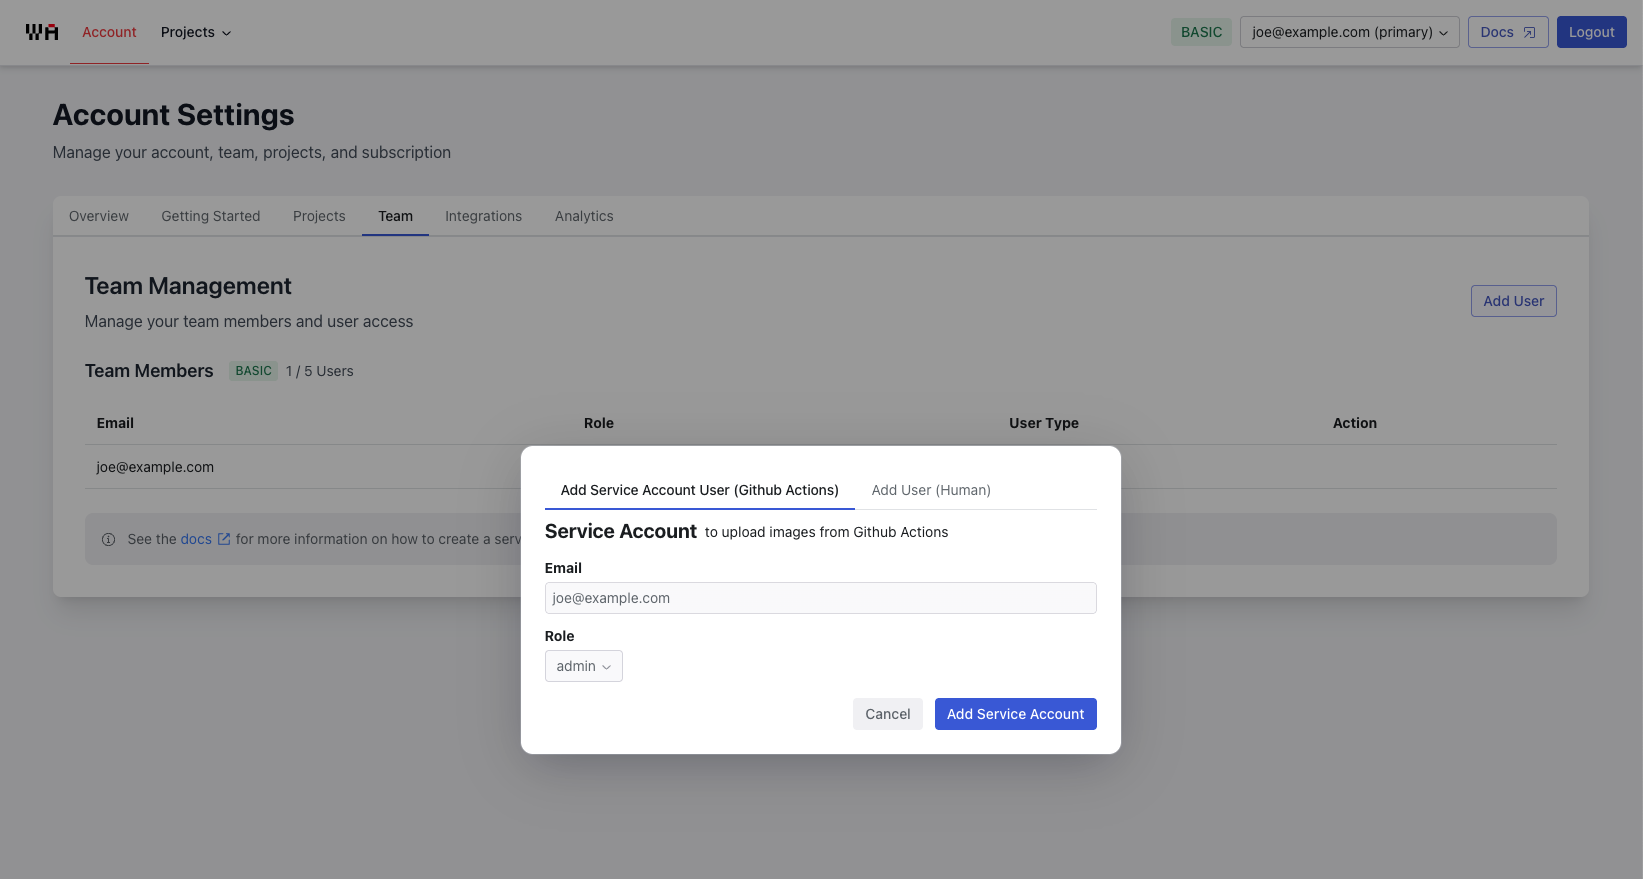
Step 2: Create a Service Account
- Click the Add User button (located in the top right)
- Use the "Add Service Account User (GitHub Actions)" tab
- Click Add Service Account to create the service account
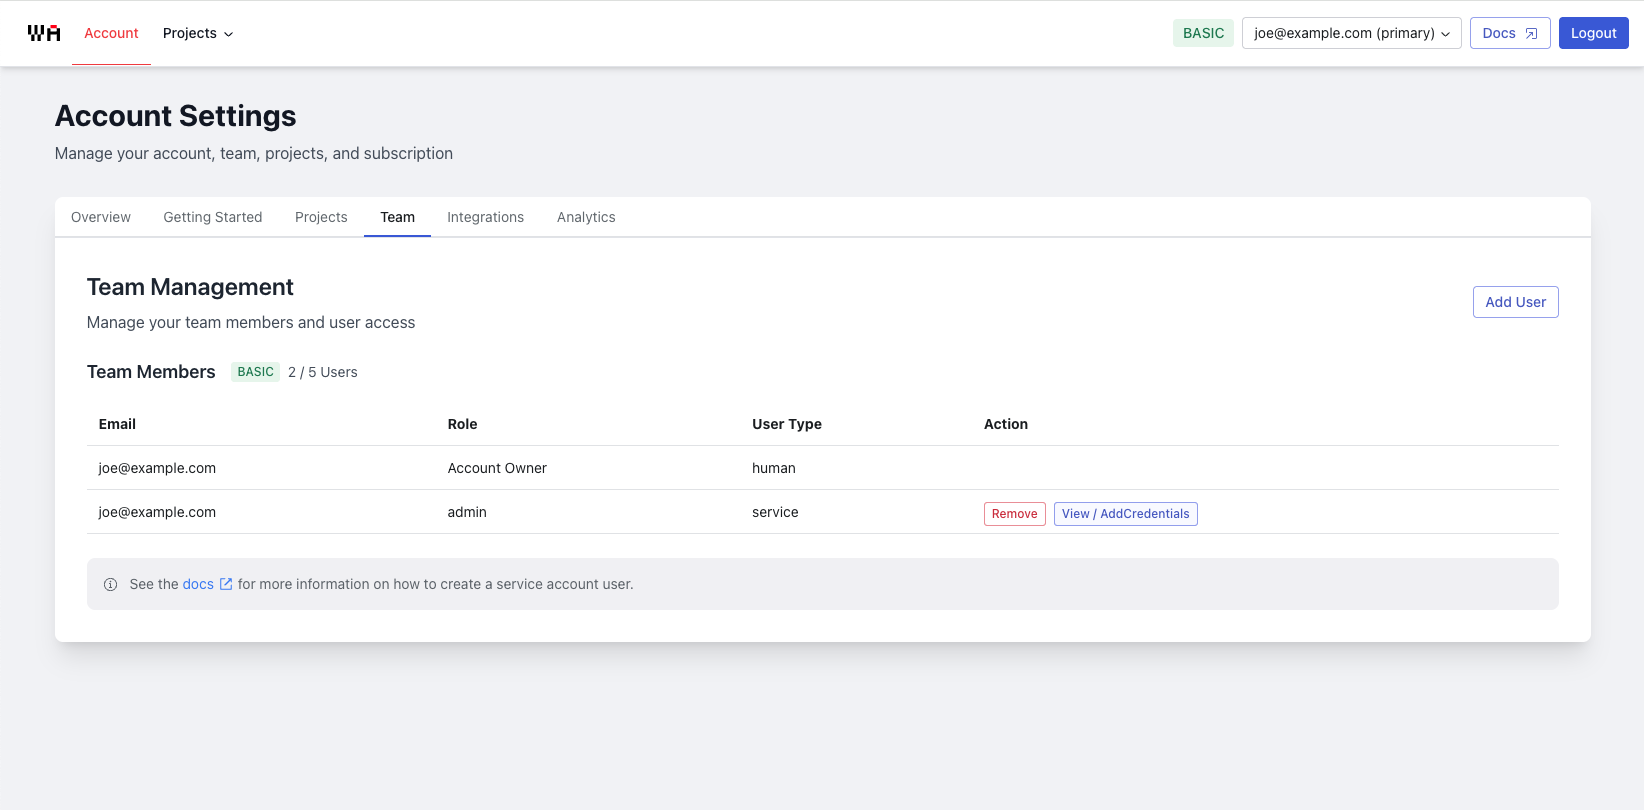
Step 3: Access Credentials
- Find your newly created service account in the users list
- Click the "View / Add Credentials" button next to the service account
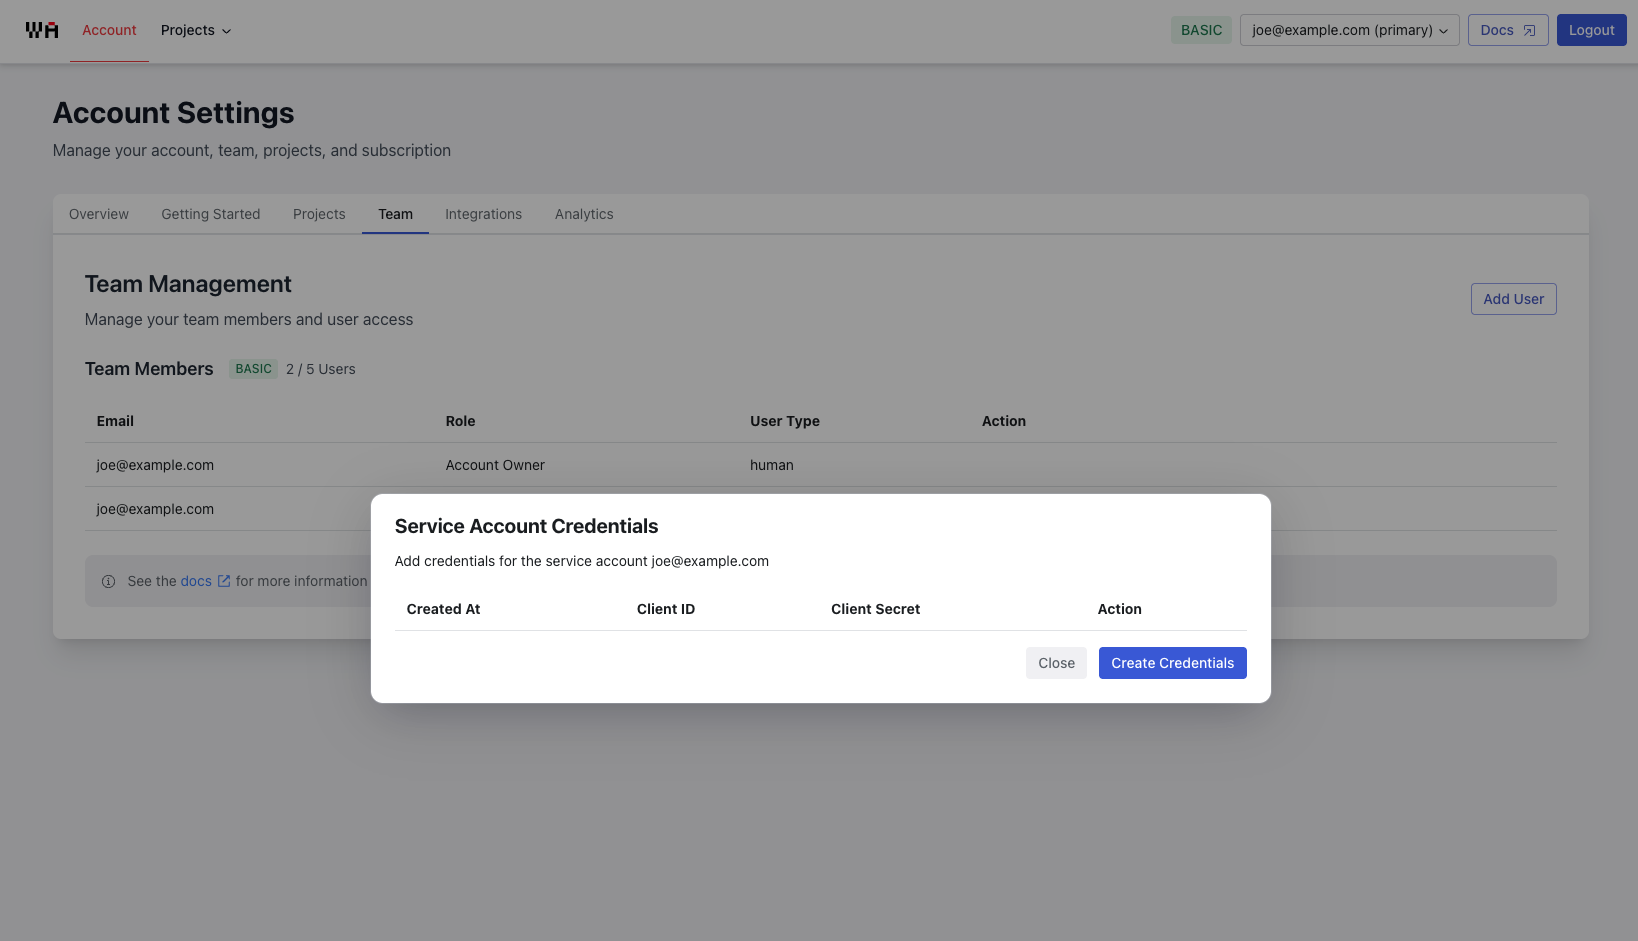
Step 4: Generate Client Credentials
- Click the "Create Credentials" button
- The system will generate a unique Client ID and Client Secret pair
Step 5: Securely Store Your Credentials
⚠️ Critical Step: Copy and save both the Client ID and Client Secret immediately.
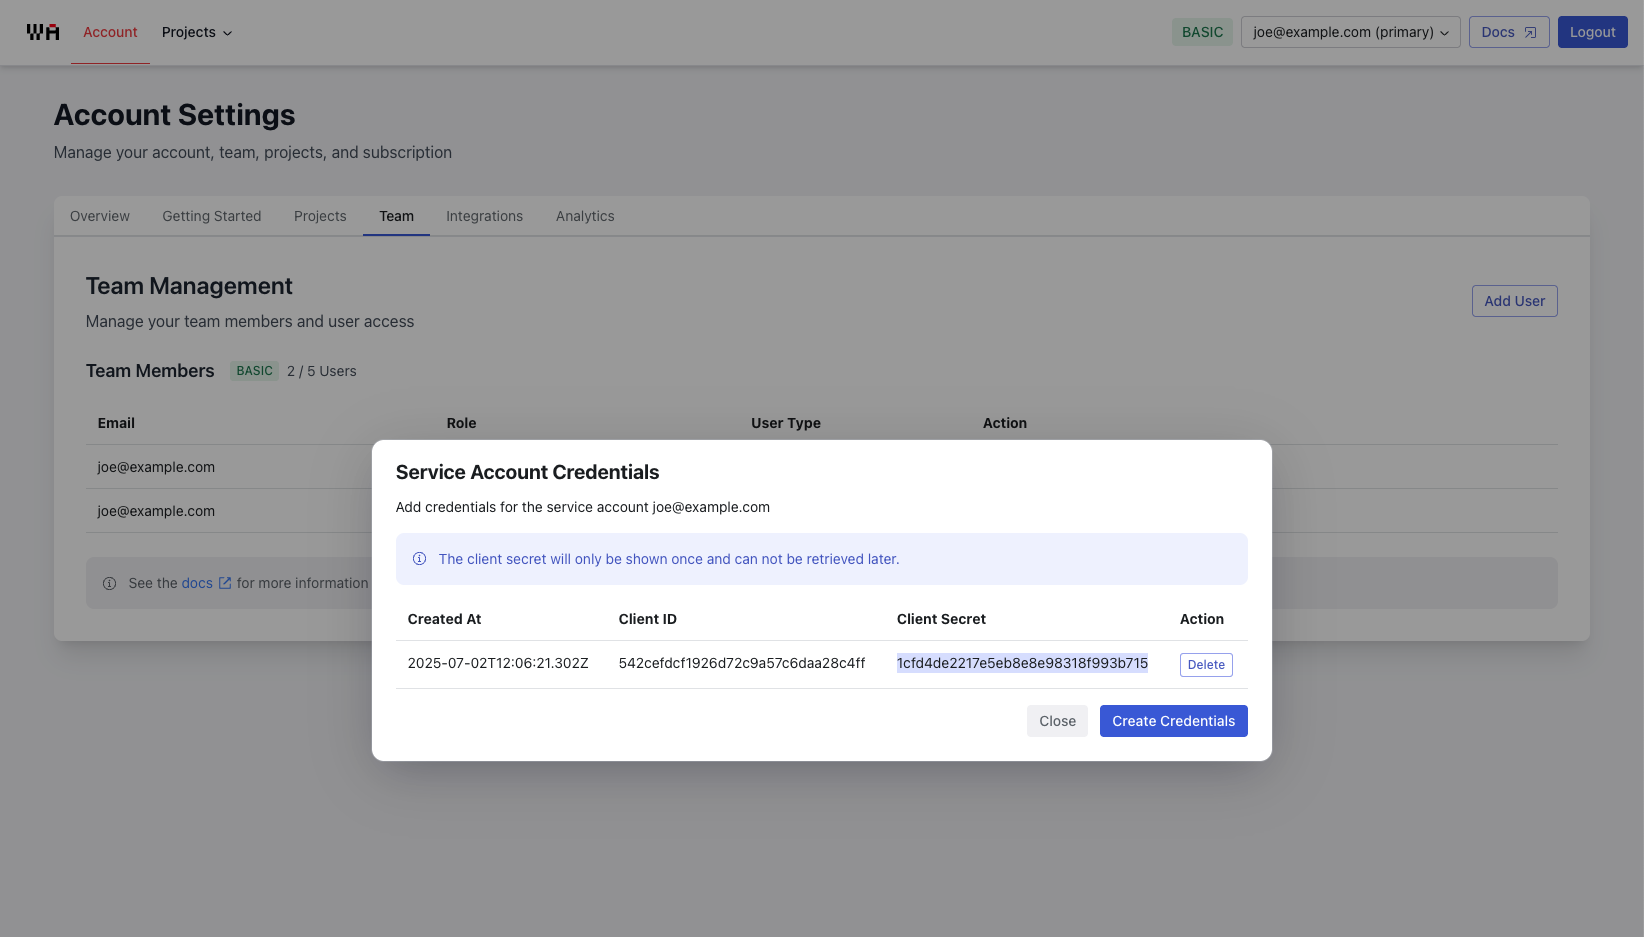
The Client Secret cannot be retrieved once you close this dialog. If you lose it, you'll need to create new credentials.
Recommended storage method:
- Copy both values to a secure note-taking app
- Store them temporarily until you add them to GitHub
- Delete the temporary copy after adding to GitHub
Step 6: Add Credentials to GitHub Repository Secrets
- Go to your GitHub repository
- Navigate to Settings → Secrets and variables → Actions
- Click "New repository secret"
- Add two secrets:
- Name:
WSA_CLIENT_ID| Value: Your Client ID - Name:
WSA_CLIENT_SECRET| Value: Your Client Secret
- Name:
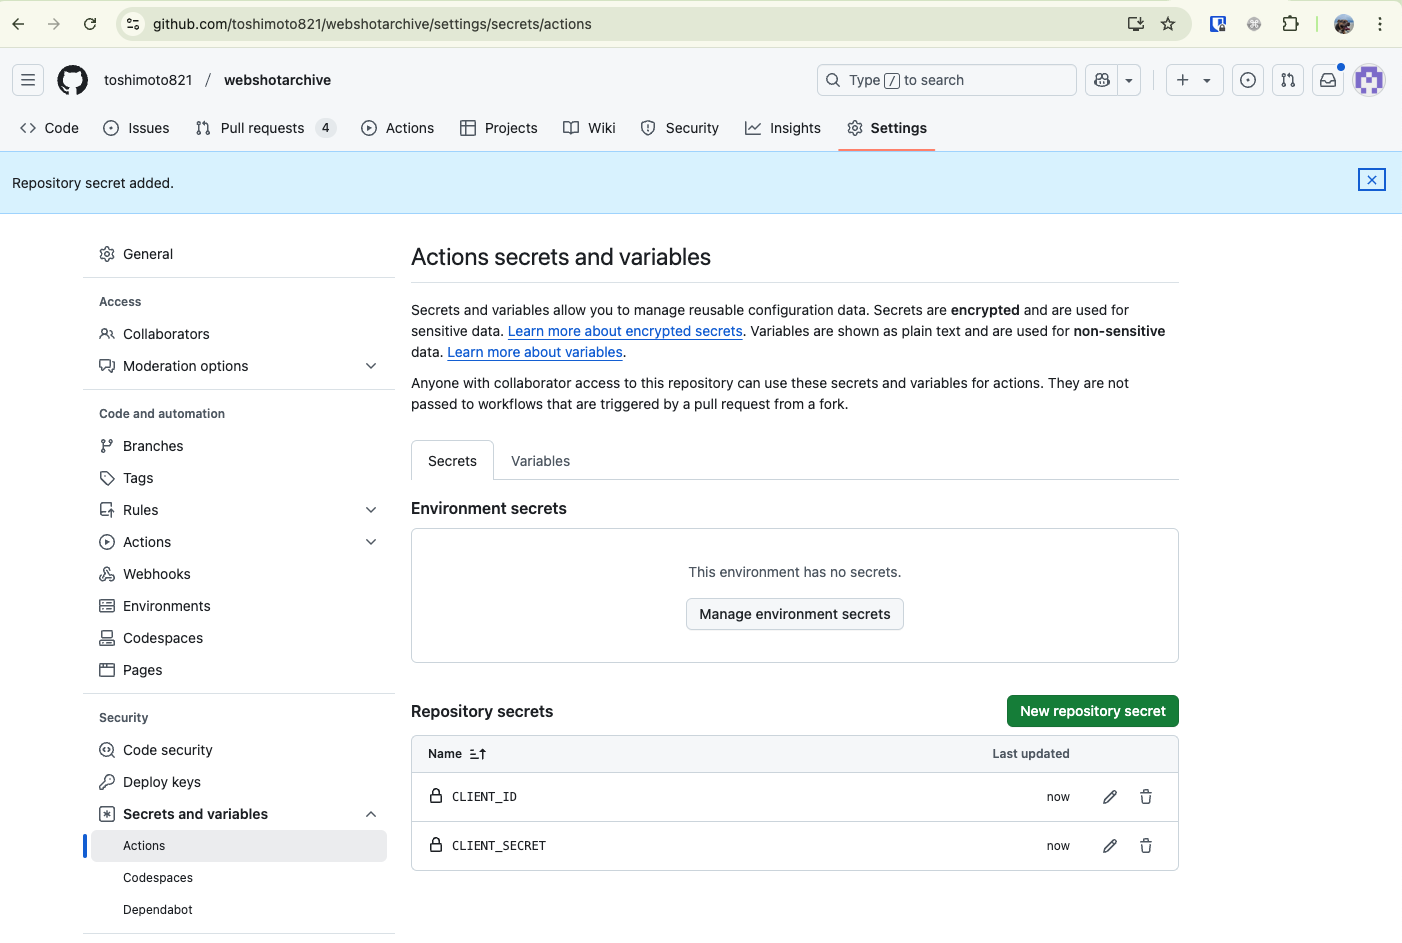
Verification
To verify your setup is working:
- Check that both secrets are listed in your repository's Actions secrets
- Ensure the secret names match exactly:
WSA_CLIENT_IDandCLIENT_SECRET - Proceed to the next tutorial to set up the GitHub Action workflow
Troubleshooting
Common Issues
Q: I can't see the "Add User" button
- Ensure you're on the correct account page:
https://www.webshotarchive.com/account/team - Check that you're logged in with an account that has admin permissions
Q: I lost my Client Secret
- No worries! Simply create new credentials by following Steps 3-4 again
- Update your GitHub repository secrets with the new values
Q: The secrets aren't working in my GitHub Action
- Verify the secret names are exactly:
WSA_CLIENT_IDandCLIENT_SECRET - Check that the values were copied correctly (no extra spaces)
- Ensure the secrets are added to the correct repository
Security Best Practices
- Never commit credentials directly to your repository
- Use repository secrets for all sensitive values
- Rotate credentials periodically
- Limit service account permissions to only what's necessary
- Monitor API usage through your Webshot Archive dashboard